With larger cuts of steak, there’s no need to worry! Don’t stand over the grill all evening; just follow this simple recipe for Oven-Cooked Sirloin Steak.
Steaks can be so daunting to cook, especially when they’re larger cuts. But there’s no need to fret! When it’s too cold and rainy outside to fire up the grill, there’s still a delicious way you can make a perfectly seared steak inside.
Before I moved to South Africa with my partner, we lived in a tiny shoebox-sized apartment in central London. You can imagine the horror on his South African face when he was told we weren’t allowed a braai (also known as a barbecue) on our balcony, or anywhere in our development.
It was a hard pill to swallow, but when we were then struck down with an eight-month-long rainy season, we were very happy to learn how to sear a steak in our dry and warm kitchen.
My only tip: open the windows and have a sous chef ready with a tea towel below the smoke detector – searing a steak indoors can get smokey!
Is an oven-baked top sirloin steak healthy?
Top sirloin comes from the sirloin section of a cow, located toward the back, and above the bottom sirloin. Top sirloin is known for being lean, flavorful, and relatively tender, and it’s a higher-quality cut compared to bottom sirloin, which tends to be tougher.
Top sirloin is a very versatile piece of meat, so you’ll often see it in stir-fries, kebabs, or served by itself. It has less fat and fewer calories than cuts like ribeye or T-bone, and it’s a protein-rich cut that is full of vitamins and minerals like B vitamins, iron, and zinc.
While there are some studies that suggest red meat is bad for you in large amounts, this is one of the healthiest cuts you can get from a cow. Consume it in moderation alongside other protein sources like poultry, fish, and plant-based options, and you’ll be just fine.
What is reverse searing?
The reverse sear method involves cooking a steak at a low temperature in the oven first, before searing the steak in a pan and serving. This method is particularly effective for thicker cuts (1.5 inches or more), as it prevents overcooking while ensuring a juicy interior. It also helps the crust form during searing, as the surface of the steak dries out in the initial oven phase.
However, this method can take longer overall, and it is harder to get the perfect result because it involves multiple steps and requires monitoring both oven and skillet temperatures. That is why, for this recipe, we’re going to be doing the opposite, and searing the steak first before putting it in the oven to finish cooking.
This method allows for more precise control over the internal doneness without overcooking the exterior. It’s also more straightforward and works well for thinner cuts of steak, and it’s a quicker cooking process without the need for extensive time management.
Below are all the internal temperatures to aim for when removing the steak from the oven:
For a 1-inch thick steak:
| Level of Doneness | Rare | Medium Rare | Medium | Medium Well | Well Done |
|---|---|---|---|---|---|
| Remove from Oven at (°F) | 120-125 | 130-135 | 140-145 | 150-155 | 160+ |
| Approx. Oven Time (Minutes) | 4-6 | 5-8 | 8-10 | 10-12 | 12-15 |
For a 1.5-inch thick steak:
| Level of Doneness | Rare | Medium Rare | Medium | Medium Well | Well Done |
|---|---|---|---|---|---|
| Remove from Oven at (°F) | 120-125 | 130-135 | 140-145 | 150-155 | 160+ |
| Approx. Oven Time (Minutes) | 6-8 | 8-10 | 10-12 | 12-15 | 15-18 |
How To Make Ahead And Store
To prepare ahead of time, pat the steak dry with paper towel on both sides. Then heavily salt it on both sides and lay it on a cooling rack either in the refrigerator for up to 24 hours, or on the counter for up to 3 hours. Come back to it every few hours to pat dry any moisture spots and apply salt as needed.
Once cooked, store leftover steak in an airtight container or wrap it in plastic wrap. You can store it in the refrigerator for up to 4 days, or in the freezer for up to 3 months. You can later reheat it in the oven, microwave, or on the stove, but I also love to cube it up and make a cold steak mayo sandwich! If you’re reheating from frozen, I recommend letting it thaw overnight in the refrigerator first.
Serving Suggestions
There are so many delicious options to serve this steak with. My partner and I love it with a steaming bowl of fresh Sushi Rice and this Vegetable Stir-Fry.
You also can’t go wrong with Air Fryer Sweet Potato Fries and a Peppercorn Ranch Salad Dressing, with a Cucumber Avocado Salad or Caesar Salad on the side for freshness.
Recipe
Ingredients
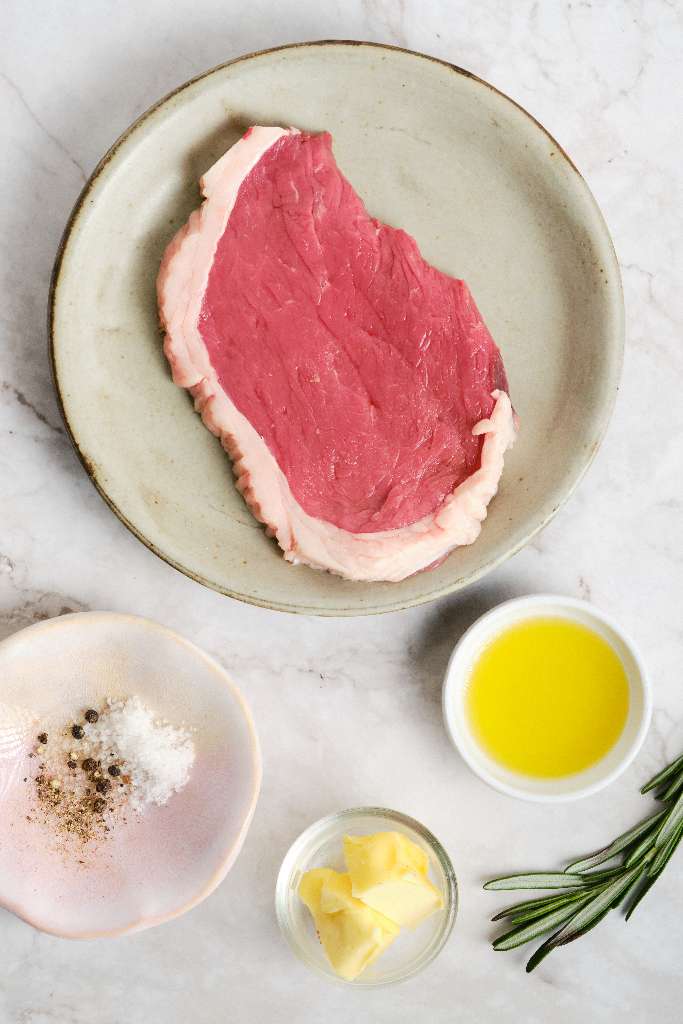
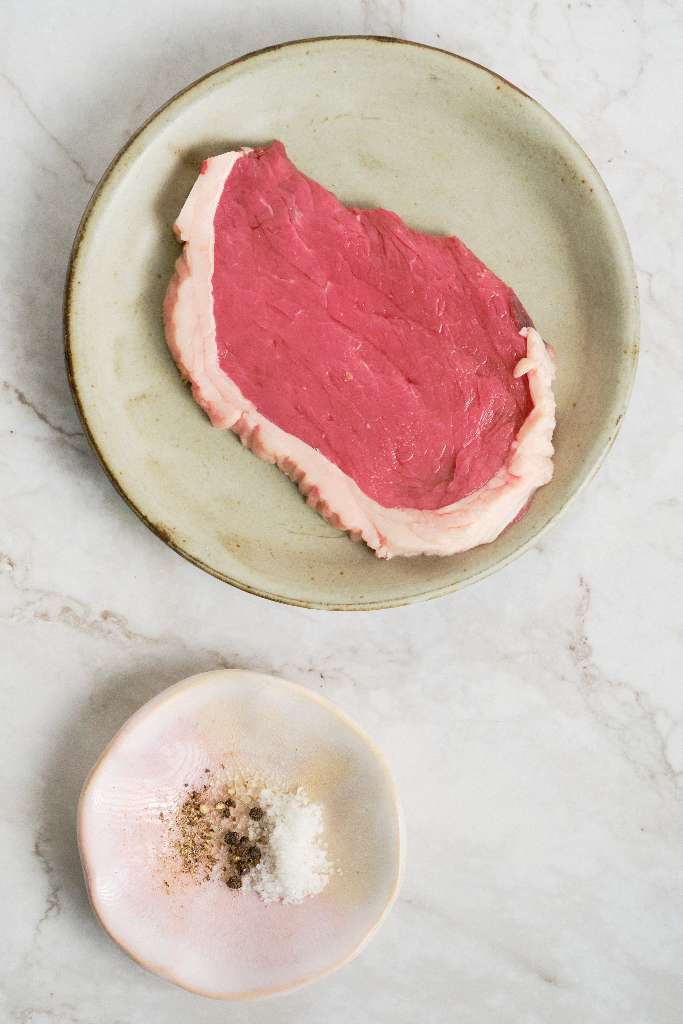
- 1 top sirloin steak
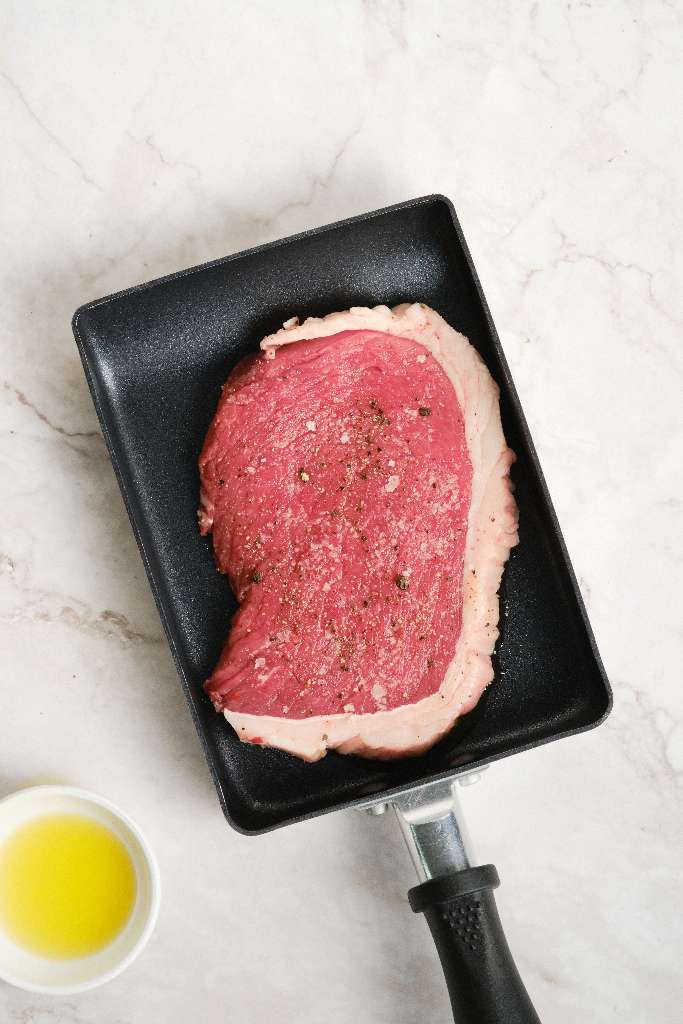
- 1 tablespoon extra virgin olive oil
- 1 teaspoon butter
- 1 sprig fresh rosemary
- Sea salt
- Freshly ground black pepper
Instructions
- Bring the sirloin steak to room temperature for at least 30 minutes before cooking. Immediately pat dry the steak on both sides, then season generously with sea salt. When you're ready to sear, pat the steak dry a final time.
- Preheat your oven to 400°F.
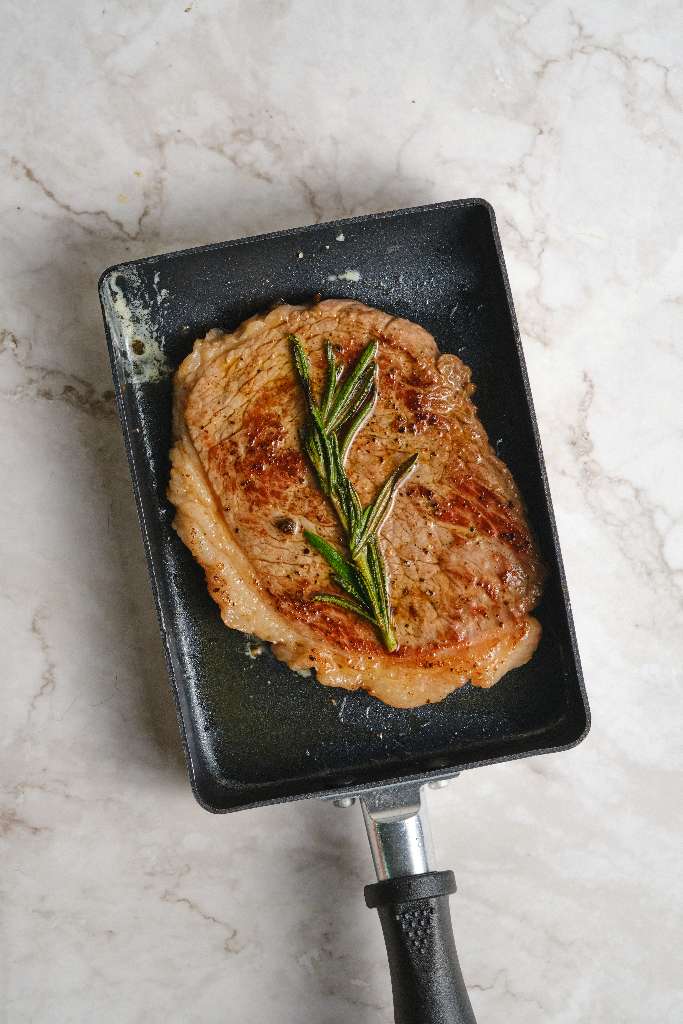
- Heat an oven-safe skillet on high heat and when it's ripping hot, add the olive oil. Add the steak to the hot skillet and sear for 1 to 2 minutes on each side, or until a golden crust has formed. For thinner steaks, lean on the side of caution. If you have a metal burger press, use it to press down the steak to develop a better crust.
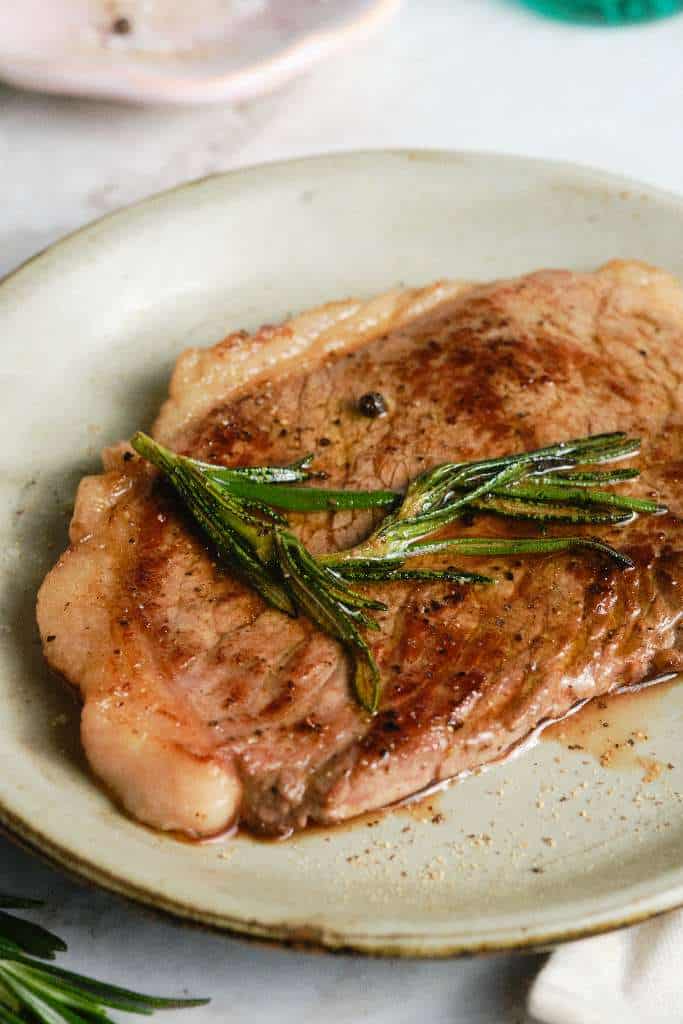
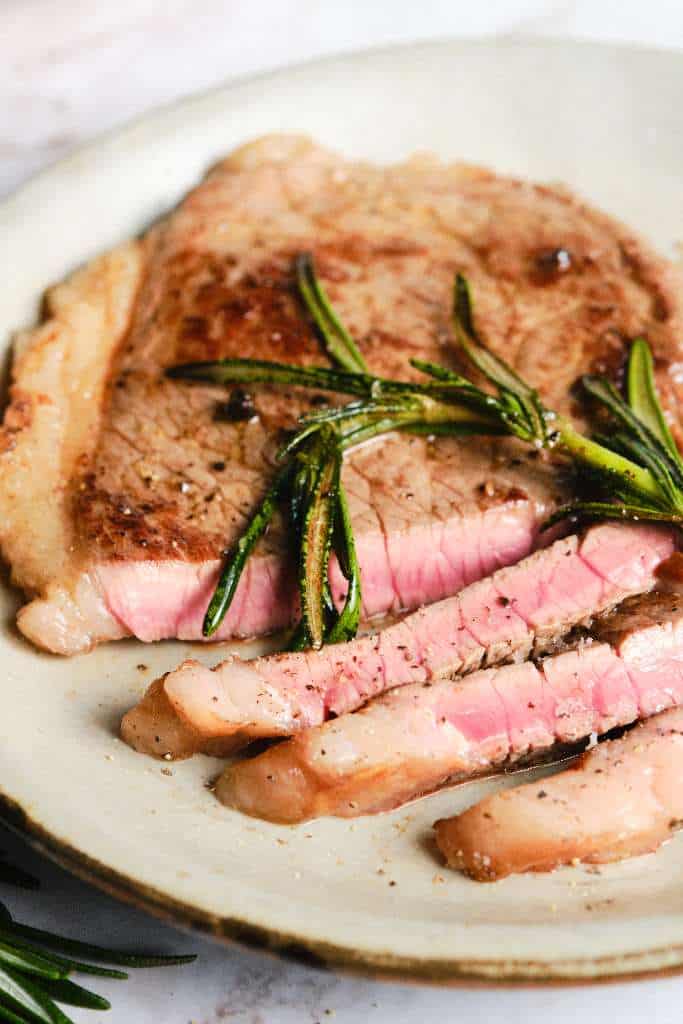
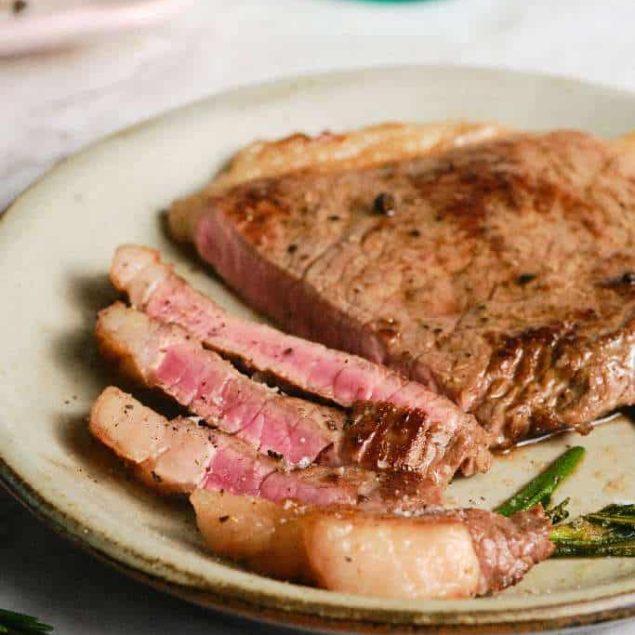
- Top the steak with butter and rosemary, then insert a meat thermometer into the steak for more accurate temperature readings. Transfer to the oven to finish cooking, and flip the steak halfway through.
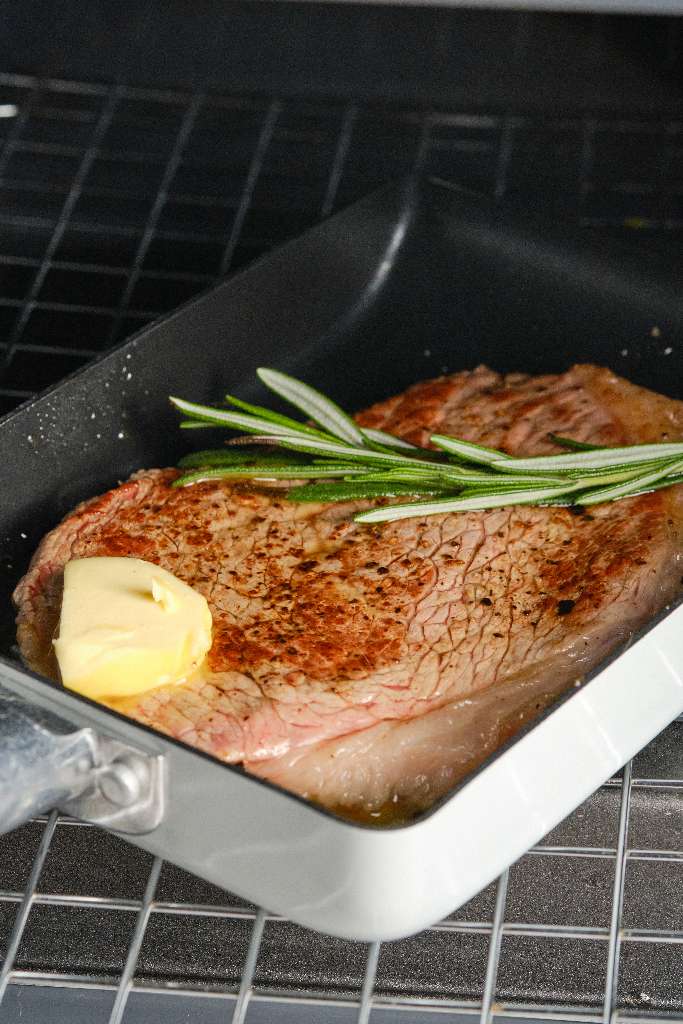
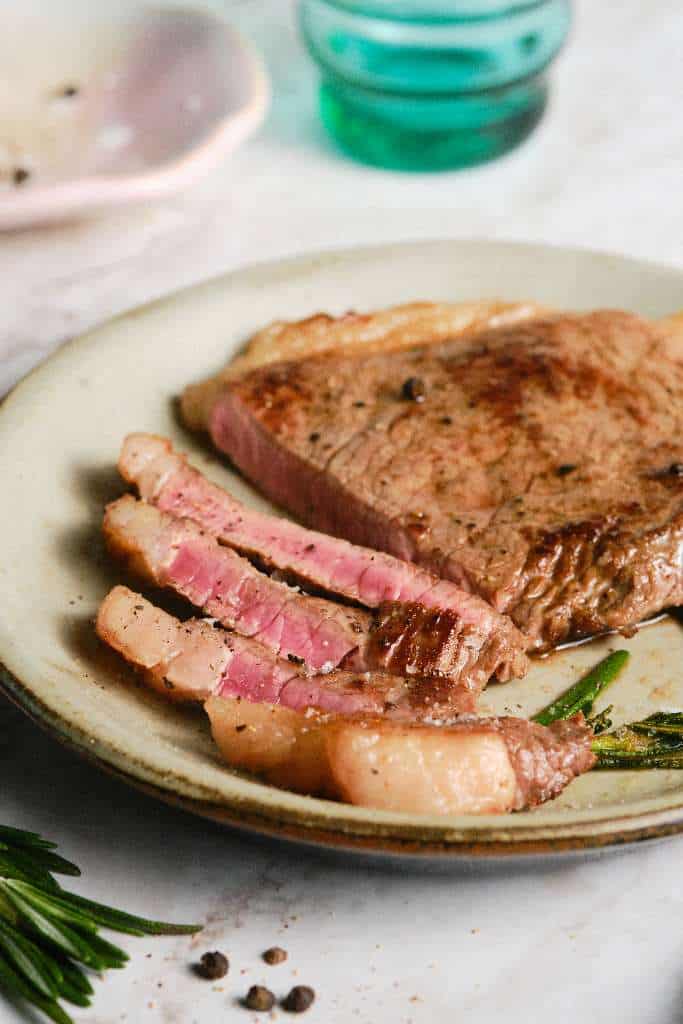
- Once your steak reaches your desired temperature (see above table for details), take it out the oven and set it on a cutting board (preferably wooden). Let the steak rest for 10 minutes, garnish with black pepper and more salt, then cut into slices.
Nutrition Info:
Recipes written and produced on Food Faith Fitness are for informational purposes only.

What TEMPERATURE do you heat the oven to ??
Hi Hilary – You can heat your oven at 400°F. I have clarified in the recipe. Thanks!