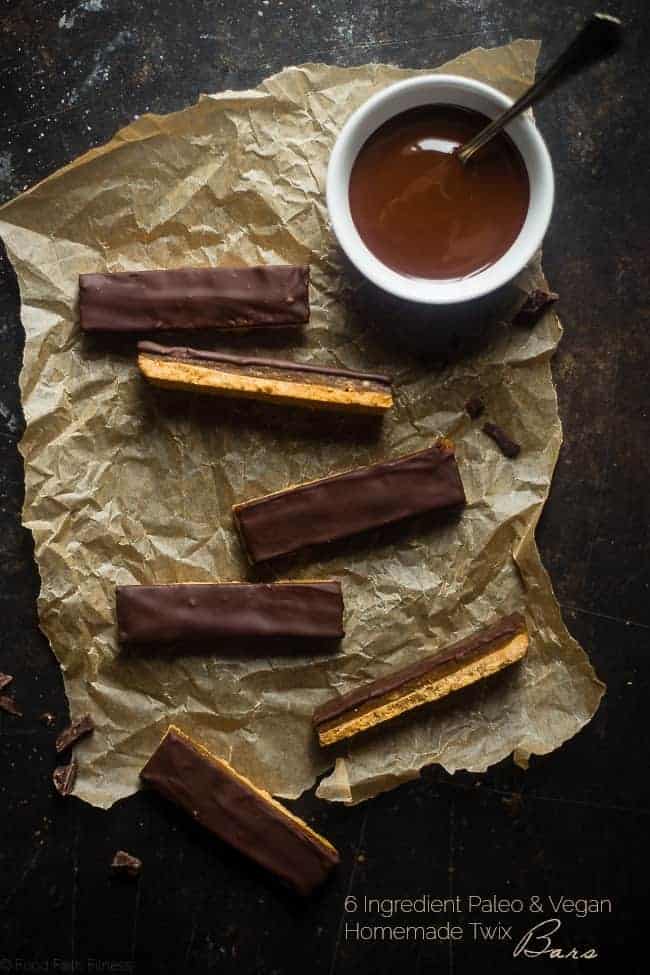
These Homemade Vegan Twix Bars are a healthier spin on a classic candy bar.
Healthy candy bars are comin’ in hot—or, I guess I should say cold, because they’re literally frozen. And once you sink your teeth into the chewy, salty, chocolaty bliss of these homemade Twix bars, you’re not going to care what the thermometer says.
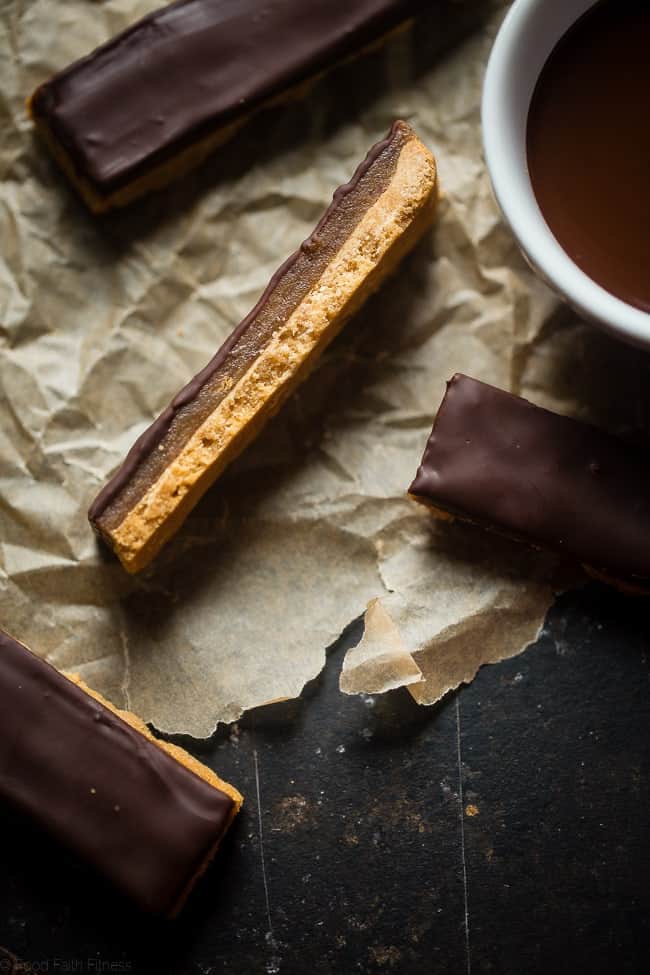
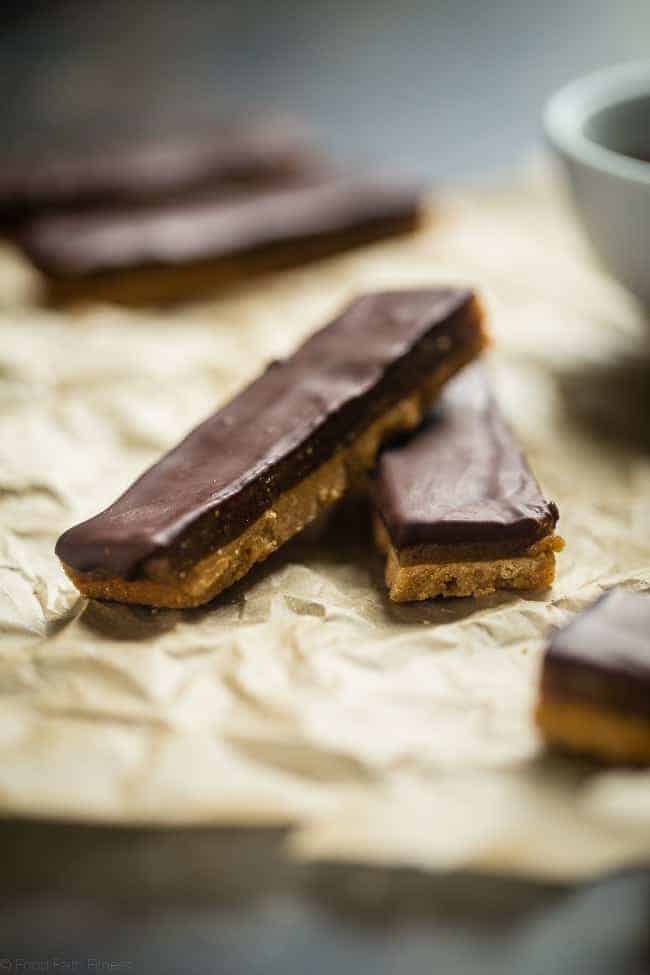
The layers are key. That buttery coconut flour crust is sturdy but still tender, and once you lay that thick date caramel on top and pour melted dark chocolate over everything, you’ve got bite-through texture perfection. It snaps, it melts, and it sticks to your teeth just enough to make you want another piece. The date caramel is my favorite part. We’ve used it before in other recipes—shoutout to those caramel apple kettle corn bars—but it really shines here. Smooth, sticky, and full of that rich, almost brown sugar taste without the actual sugar.
This is the dessert I reach for when I want to feel like I’m indulging, but I don’t want to reach for actual candy. The crust never fails, and I always stash a batch in the freezer for those afternoons when I’m two spreadsheets away from losing it. And let’s be real, cutting into these bars with a warm knife is a very specific kind of self-care I highly recommend.
Are Homemade Vegan Twix Bars Healthy?
They’re healthier than an actual candy bar. The gluten-free crust is made with coconut flour, which is high in fiber and low in carbs, and using agave as a sweetener keeps the bars vegan.
The date caramel is packed with nutrients like potassium and fiber, while dark chocolate adds a touch of antioxidants to the mix. So while they’re still a dessert, these bars have their wholesome qualities.
Date Caramel Deserves More Credit
Everyone’s always raving about using maple syrup or coconut sugar, but I’m telling you, dates are where it’s at. Specifically, dates make the most decadent “caramel” that you can use in all sorts of sweet applications. The flavor is rich and naturally sweet and has that nostalgic candy bar vibe without needing any dairy or refined sugar.
In this recipe, the date caramel plays the role of that thick, chewy center layer of the Twix bar. But you could totally keep some extra in your fridge for other things, like stirring into oatmeal or drizzling over chocolate-dipped frozen bananas. In fact, I recommend it!
How Do I Store Leftovers?
Once the bars are fully set, keep them in an airtight container in the fridge. They’ll stay fresh for about a week. You could also freeze them in a single layer or with parchment between layers to avoid sticking. They’re actually pretty great straight from the freezer!
Serving Suggestions
If you’re into the chewy, layered, chocolaty vibe of homemade Twix bars, there are some other treats on FFF that hit similar notes, complete with nostalgic flavors and better-for-you ingredients. These Gluten-Free Samoa Scones With Greek Yogurt are like if a Samoa cookie and a buttery pastry had a baby, while these Sugar-Free Keto Low-Carb Granola Bars are perfect for those who love the idea of candy-inspired bars but want something lower in carbs. Finally, if you’re actually feeling more indulgent, try these Seven-Layer Cookies; they’re like a Twix bar’s over-the-top cousin.
Recipe
Ingredients
For The Crust:
- 1/3 cup coconut oil room temperature
- 3 tablespoons honey or agave
- pinch salt
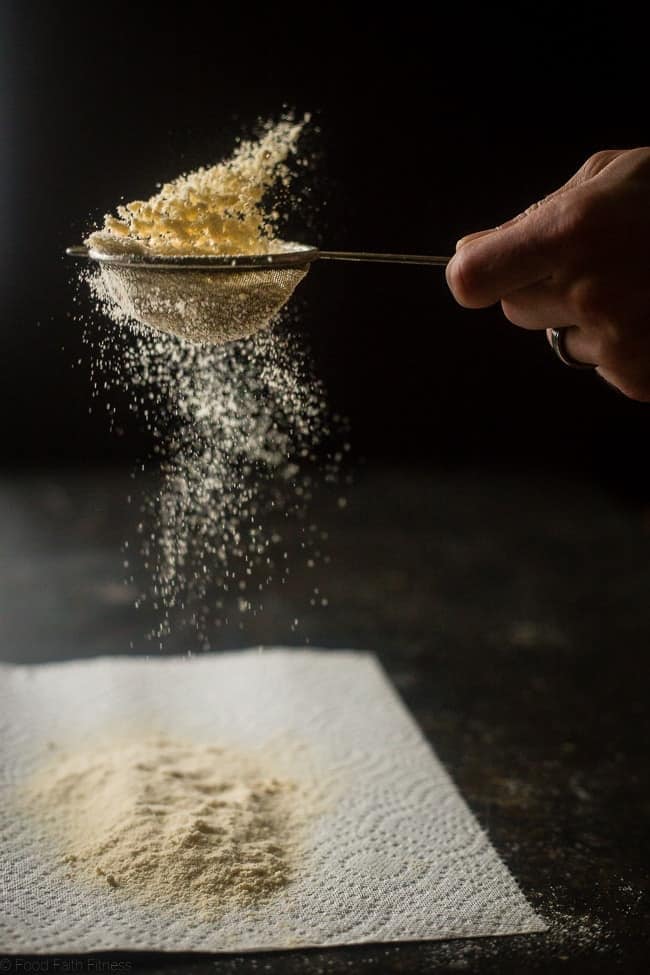
- 3/4 cup coconut flour sifted, 66 grams
For The Caramel:
- 2 cups dates halved, lightly packed
- 1 tablespoon coconut oil melted
- 1 tablespoon unsweetened vanilla almond milk hot
For The Chocolate Coating:
- 3 ounces dark chocolate roughly chopped
- 1/4 teaspoon coconut oil
Instructions
- Preheat your oven to 350°F and line an 8×8-inch pan with parchment paper, leaving an overhang over the sides to use as a handle when the bars are set.
- In a large bowl using an electric hand mixer, beat together the coconut oil, honey, and salt until creamy and smooth.
- Stir in the sifted coconut flour until a wet dough forms. Form the dough into a flat disc and wrap with plastic wrap, or place on a piece of parchment paper. Refrigerate until the dough has set a little bit and lost some of its "stick." This takes about 8-10 minutes.
- Once chilled, press the dough evenly into the bottom of the prepared pan. This may be a little difficult at the beginning because the parchment paper may move around. I found that holding it with one hand while pressing with the other worked well. Additionally, if your dough is quite sticky, you can use a small piece of parchment paper to press out the dough.
- Bake until the crust is golden brown, about 9-10 minutes. If your crust rises a little bit, gently press it flat with a large spoon once it comes out of the oven. Let cool for 5 minutes.
- While the crust cools, place the chopped dates in a medium, microwave-safe bowl and microwave until hot, but not burned, about 1 1/2-2 minutes.
- Add the hot dates into a small food processor and use the "chop" setting until they are broken down into small pieces. Then, turn to the "purée" setting until the dates are creamy and begin to form a ball.
- With the food processor running, stream in the coconut oil and hot almond milk until the dates are broken down, sticky, and smooth.
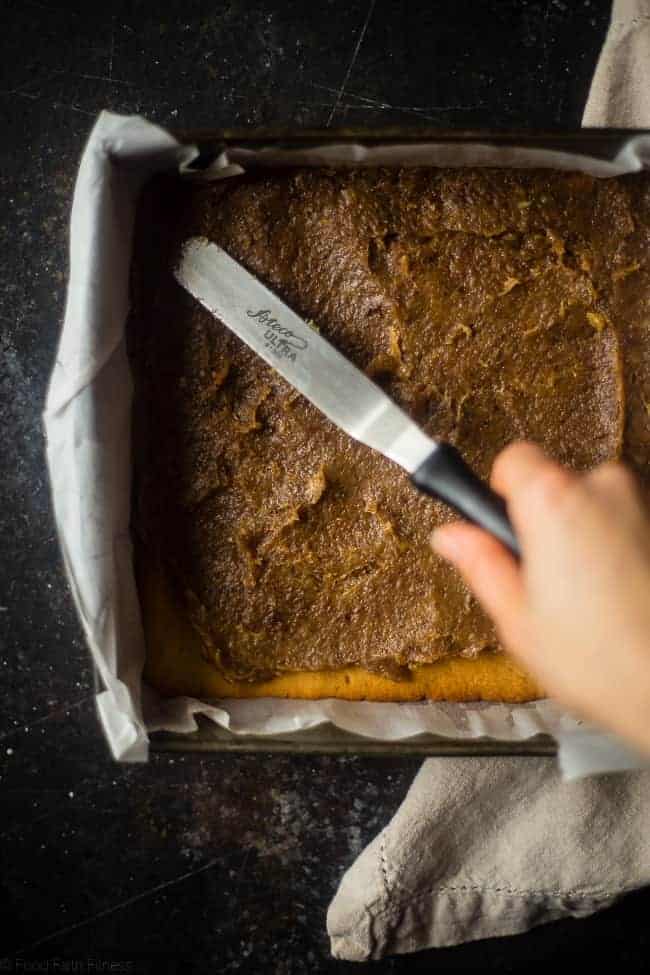
- Once the crust has finished cooling for 5 minutes, gently spread the date caramel on top evenly, making sure to not break the crust.
- Place the pan into the refrigerator until the caramel is hard, at least 3 hours.
- Once the caramel is hard, lift out of the pan and slice into 16 bars. Additionally, line a cookie sheet with parchment paper.
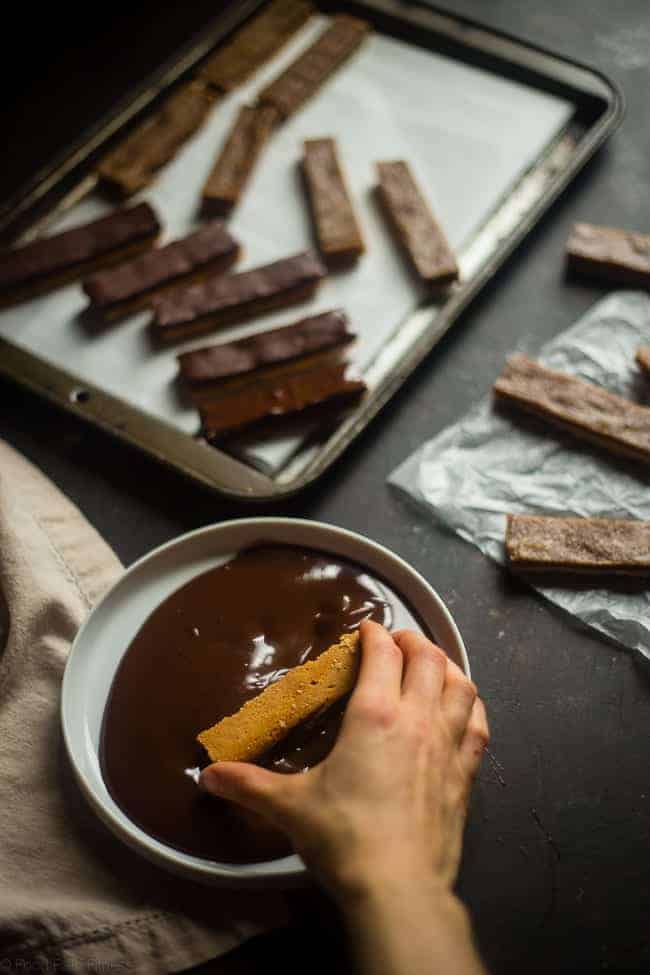
- Place the chocolate and 1/4 teaspoon of coconut oil in a small microwave-safe bowl and microwave for 30-second intervals on half power, stirring between each interval, until the chocolate is smooth and melted.
- Pour the chocolate into a small shallow plate with sides. Gently pick up each bar by the sides and dunk the top into the chocolate until it's fully covered. Gently shake off any excess and place onto the parchment paper-lined cookie sheet. Repeat with all the remaining bars.
- Place into the refrigerator for 10 minutes to set the chocolate.


Leave a Comment